Fixing and 3D printing a colour interior model
Fixing and 3D Printing a Colour Interior Model
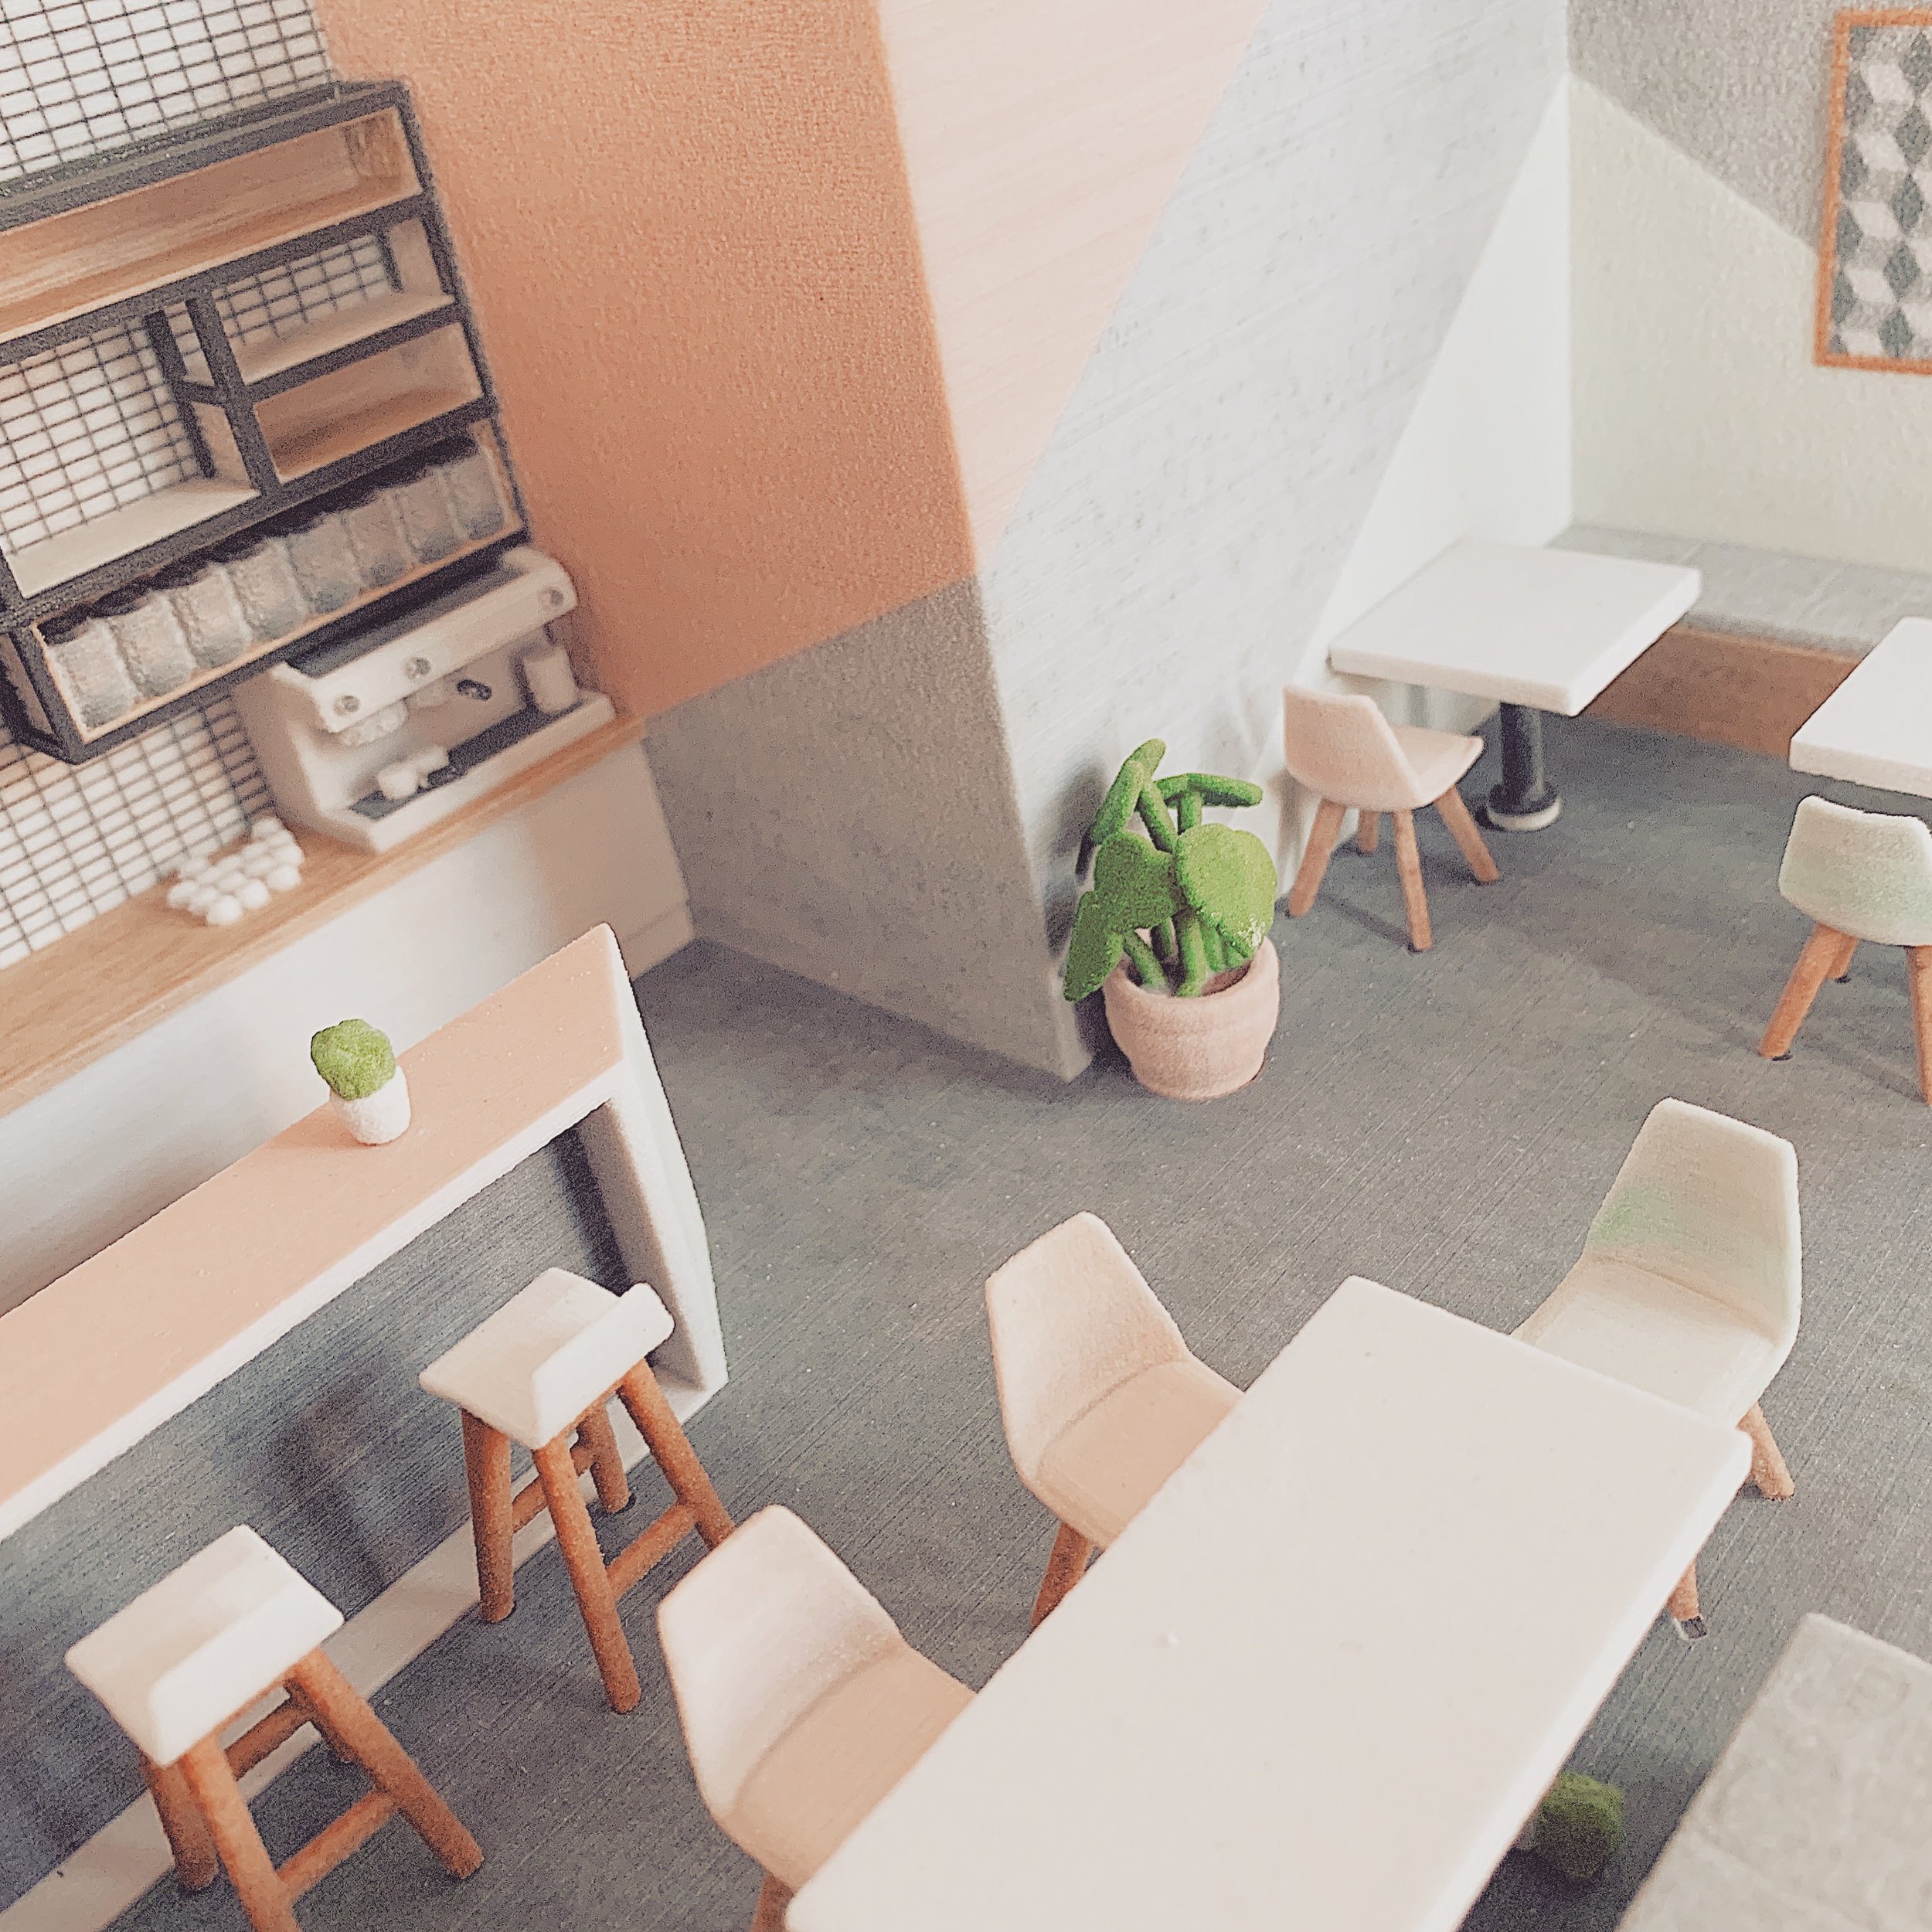
As you may have seen on our Instagram, we were recently working with a colourful interior fit-out model. It brought up a few more issues than we anticipated and we’d therefore like to share how we overcame them.
(This is a specific use case of how a file is fixed – for a less technical description please follow our Fixing Series, which supports live project descriptions with a more general overview of 3D printing and file fixing principles.)
Starting Point: Importing the Model
The model was originally created in SketchUp and imported directly into our file preparation software. The textures and colours applied in SketchUp are also conveniently imported.
This can be both a blessing and a curse, as heavy textures can often slow down our software.

Running Diagnostics on the Imported Model
Once imported, the model is run through a diagnostics check. This reveals all the errors in the model which must be fixed before it is printable.
Bad Edges and Flipped Triangles
As shown in the diagnostics image, this model had multiple errors indicated by coloured lines:
Bad edges (yellow) occur when triangles or surfaces are not properly connected, leading to gaps in the model mesh.
Flipped triangles or surfaces (red) indicate inverted geometry that will cause printing issues.
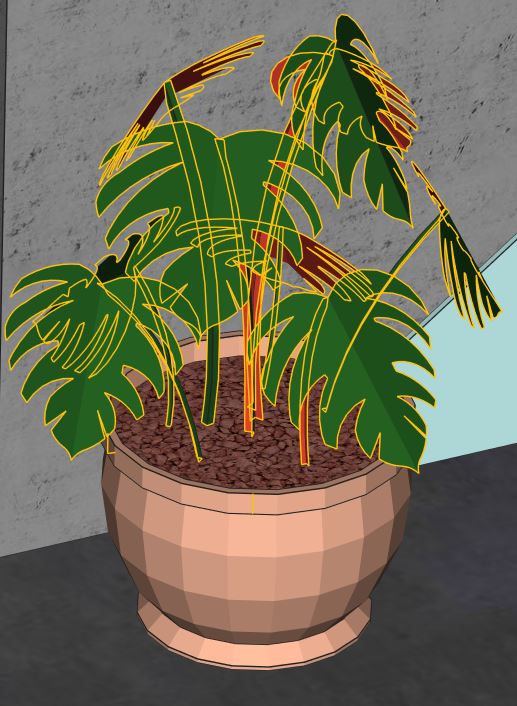
Why Single Surfaces Fail in 3D Printing
Single surfaces will not survive post-processing or may not print at all. All surfaces need to have a thickness in order to work in the 3D printing process.
Shell Thickness and Structural Integrity
Part thickness is determined by all the connected surfaces creating a shell. All parts must be one complete shell with no bad surfaces or holes in order for them to print successfully.
Understanding Shells in 3D Printable Models
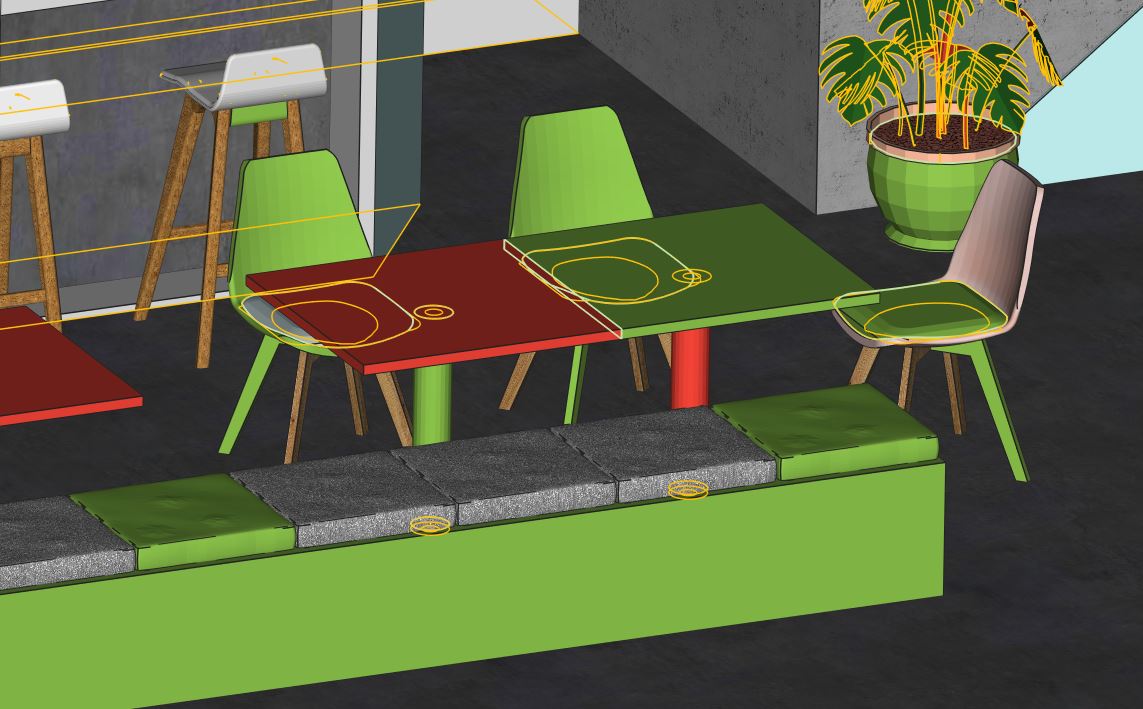
A model can be made up of multiple shells, like those displayed in the image highlighted in green.
Why Multiple Shells Must Be Unified
Even a simple object like a chair can be made up of multiple separate shells — the legs, the back, the cushion, and even the screws if very detailed information has been supplied.
In order for the part to print correctly and not fall apart during the process, these shells need to be unified into a single shell.
The ultimate goal for any model is to create a single shell with no holes, bad edges, or inverted surfaces — in other words, no errors whatsoever.
The ultimate goal for any model is to create a single shell with no holes, bad edges or no inverted surfaces - in other words: no errors whatsoever!
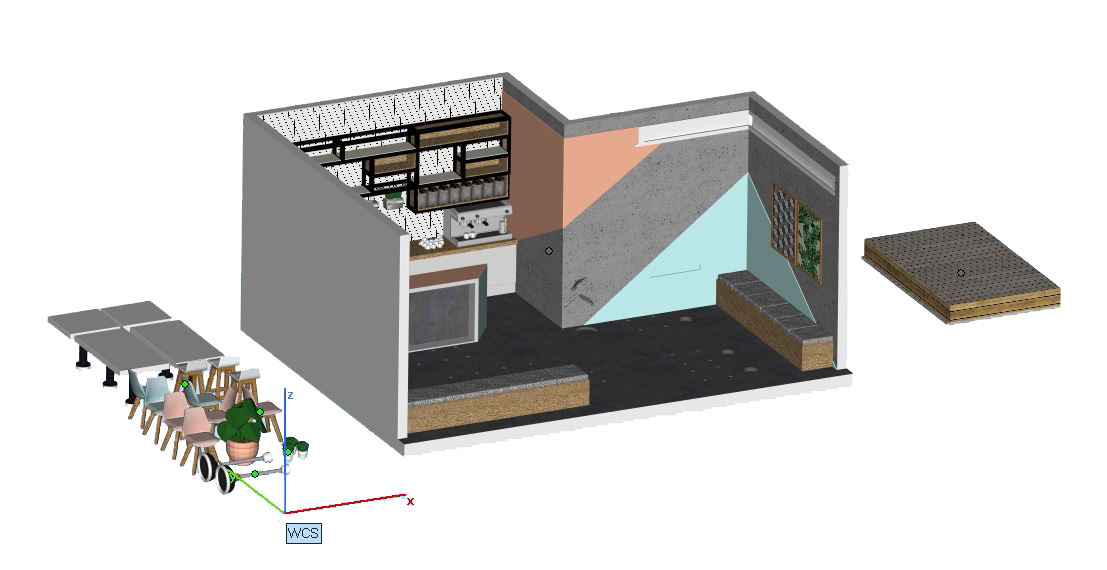
File Fixing Workflow: Breaking Models into Parts
File fixing, like life, is all about breaking things down into manageable chunks to make it all seem achievable.
Once the model has been split into manageable parts, each part can be fixed individually, one at a time.
Post-Processing Benefits of Printing in Separate Parts
Breaking down a model can also help improve the overall finish, as it allows access to areas that require post-processing, such as hand finishing and brushing after printing.
All parts can be finished individually and assembled to bring the model together. While models can be 3D printed in one piece, breaking them down provides greater flexibility and finishing control.

Infiltration in CJP Gypsum Powder Printing
Another benefit of breaking the model up in CJP gypsum powder printing is infiltration.
How Infiltration Strengthens Colour Prints
Infiltration is the process of letting glue seep into the porous powder, giving the model strength and making the saturated colour come to life.
Common Gluing and Infiltration Mistakes
When gluing a model, it is vital that all surfaces are brushed meticulously to remove any loose surface material not removed by compressed air.
If uncured surface material remains, the end result will appear patchy and may give a bleach-like stain on the model’s surface.
Patchy Surfaces and Double Gluing
It is equally important that infiltration with cyanoacrylate is carried out quickly and efficiently. If the infiltrant dries at different speeds, shiny patches may appear — often referred to as double gluing.
All excess glue should be removed from the surface before drying to reduce the risk of these shiny effects.
Drying, Handling, and Aftercare for CJP Models
Infiltrated parts should be left to dry thoroughly before handling. Moisture can interfere with the drying process and result in white patches on the model.
Natural oils from fingers can also leave marks at this stage, so handling should be avoided until fully dry.
Preventing Discolouration and Damage
For aftercare, it is important never to get a CJP gypsum powder model wet. Water will react with the material and cause a bleaching effect.
Similarly, placing the model in direct sunlight will cause a CJP 3D printed model to discolour over time.
Final Thoughts
We hope this hasn’t been too much to take in and that, together with our supporting blogs, it helps make sense of the work we do for your models at Fixie.
If you’d like to know more, we’d love to hear from you directly at info@fixie3d.com.