How to Optimize Your 3D Models for Printing Success
There is a gap that catches a lot of architects and designers off guard. You can spend hours building a detailed, accurate digital model that looks perfect on screen — only for the final print to come back with missing geometry, collapsed walls, or visible surface defects.
In most cases, the problem is not the printer. It is the file.
Designing for visualisation and designing for physical 3D printing are two very different disciplines. A model created for BIM, rendering, or documentation does not automatically translate into a print-ready object.
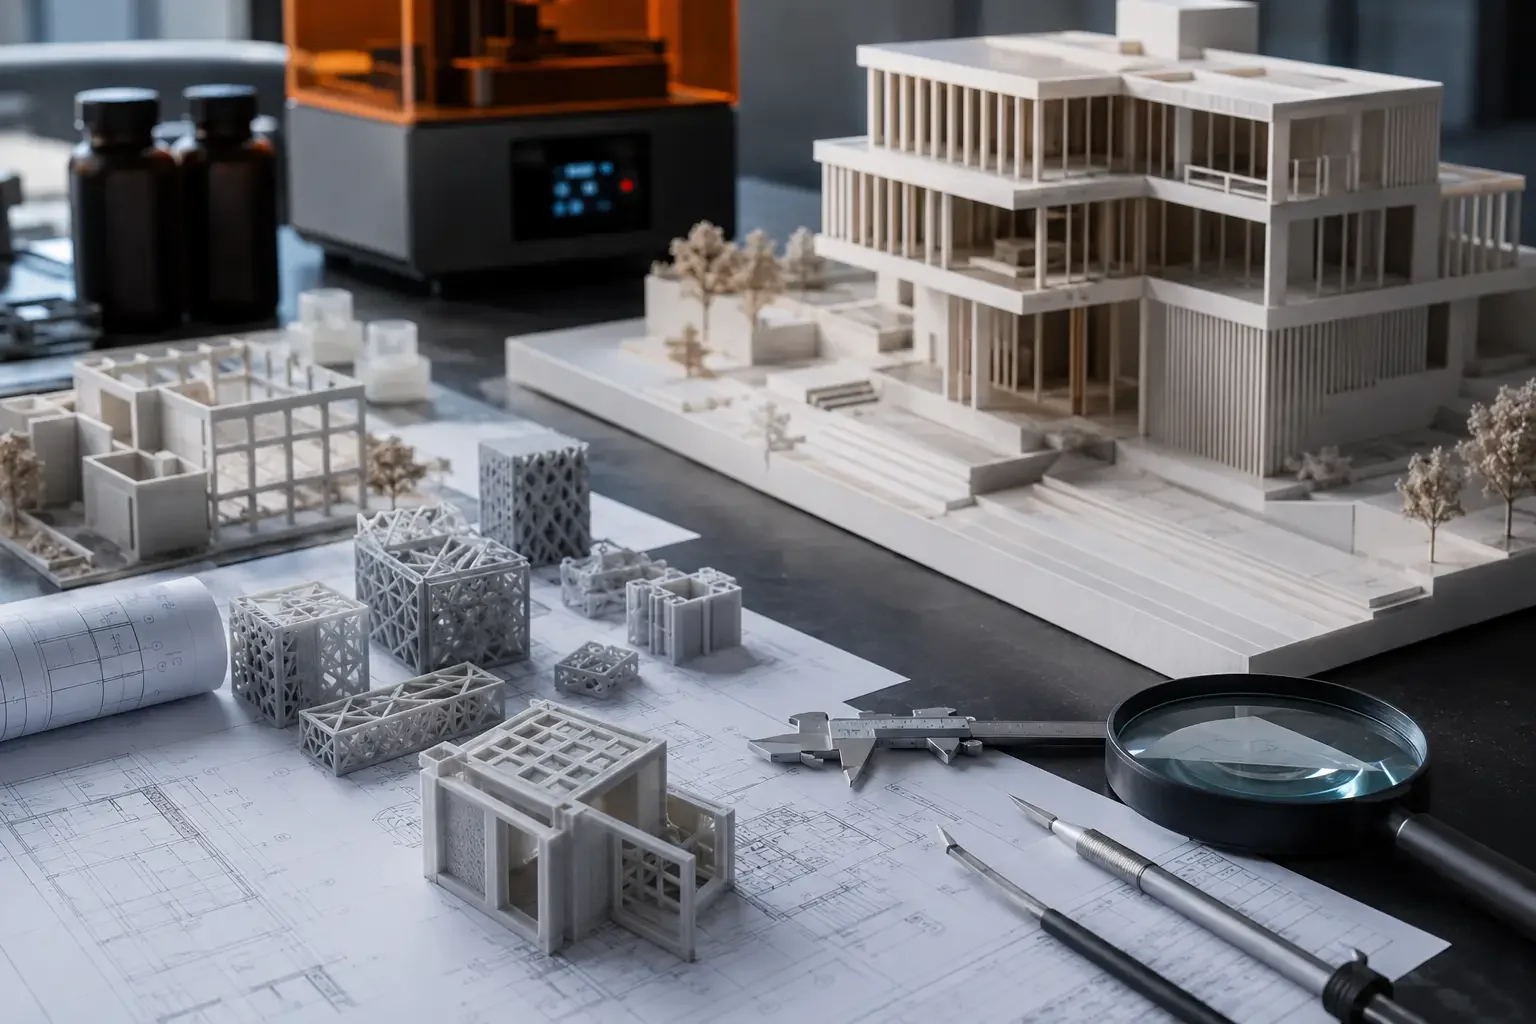
At Fixie 3D, we optimise files every day for architects and model makers across London. This guide explains the key principles that help transform a digital design into a successful physical print.
Understand the Difference Between a Design Model and a Print-Ready Model
Design Models vs Physical Manufacturing
Most CAD and BIM platforms — including Rhino, Revit, ArchiCAD, and SketchUp — are built primarily for:
Visualisation
Documentation
Design development
They are not inherently designed for manufacturing.
As a result, design models often contain geometry that works perfectly on screen but creates serious issues in 3D printing.
Common Problems in Non-Optimised Models
Typical print issues include:
Overlapping surfaces
Open meshes
Non-manifold geometry
Reversed normals
Infinitely thin surfaces
Duplicate faces
These flaws may be invisible during rendering but become critical when a printer attempts to generate a physical object layer by layer.
What Makes a Model Print-Ready?
A print-ready model must be:
Closed
Watertight
Manifold
Structurally printable
This means:
No holes
No open edges
No intersecting geometry
No unsupported ultra-thin elements
Optimisation is the process of transforming a design model into a physically manufacturable object.
Check and Repair Your Mesh Before Exporting
Why Mesh Quality Matters
Most 3D printing workflows rely on STL or OBJ exports, which convert geometry into triangular mesh surfaces.
The quality of that mesh directly impacts:
Print accuracy
Surface smoothness
File reliability
Slicing performance
Choose the Right STL Export Resolution
When exporting STL files:
Low Resolution Problems
If resolution is too low:
Curved surfaces become faceted
Circular forms appear angular
Visible triangles appear on smooth geometry
High Resolution Problems
If resolution is too high:
File sizes become unnecessarily large
Slicing slows down
Processing errors become more likely
For architectural models, medium-to-high export resolution usually offers the best balance.
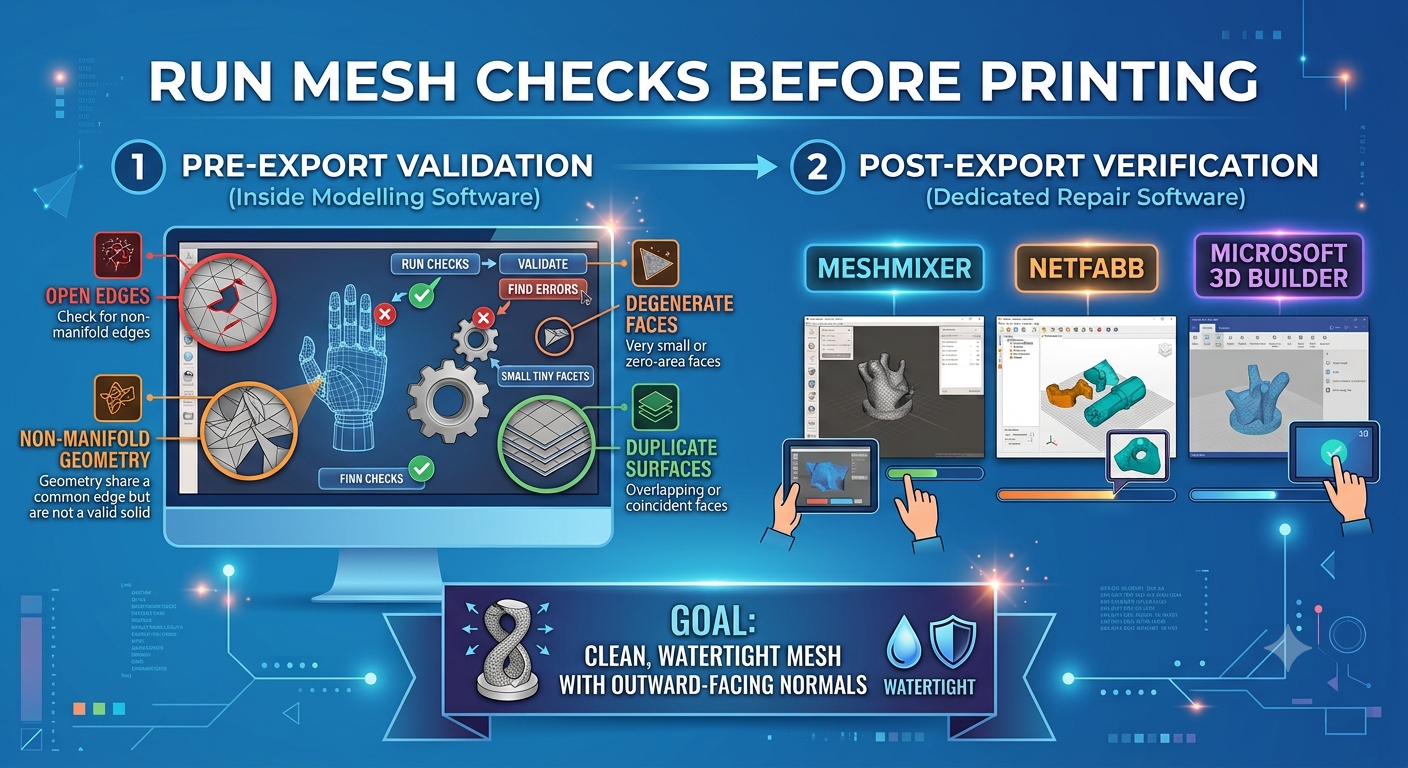
Run Mesh Checks Before Printing
Before exporting, run validation checks inside your modelling software.
Look for:
Open edges
Non-manifold geometry
Degenerate faces
Duplicate surfaces
After export, verify the file in dedicated repair software such as:
Meshmixer
Netfabb
Microsoft 3D Builder
Your goal is a clean, watertight mesh with outward-facing normals.
Get Wall Thicknesses Right
Why Thin Geometry Fails
Insufficient wall thickness is one of the most common causes of print failure.
Every printing technology has minimum printable dimensions.
Typical Minimum Wall Thicknesses
SLA Printing
Recommended minimums:
Approx. 0.5–0.8 mm
Anything thinner risks fragility or complete print loss.
FDM Printing
Typically tied to nozzle diameter:
Around 0.4–0.8 mm
SLS Printing
Can handle thinner walls than FDM but still has practical limits.
Architectural Features Most at Risk
Small-scale architectural details often become too thin to print successfully.
Common problem areas include:
Window frames
Glazing bars
Railings
Structural columns
Thin canopy edges
Perforated screens
If geometry falls below printable limits, you must either:
Increase thickness intentionally
Simplify the detail
Adjust the model scale
Manage Scale Carefully
Scale Changes Everything
Architectural model making becomes technically complex because scale directly affects printability.
For example:
At 1:500 scale, a real-world 100 mm frame becomes only 0.2 mm thick in the model — below the printable threshold for nearly every technology.
Simplify Details at Smaller Scales
Good architectural models do not attempt to reproduce every microscopic feature.
Instead, they focus on:
Overall form
Proportion
Character
Legibility
Smaller scales require abstraction and selective simplification.
Plan Large-Scale Assemblies Properly
At larger scales such as:
1:100
1:50
1:20
—you gain more freedom for detailing but may need to split models into sections for printing.
When splitting models:
Place joins at natural seams
Use clean alignment surfaces
Plan assembly early
Address Overhangs and Support Structures
What Are Overhangs?
Any geometry extending outward without support underneath is considered an overhang.
Most printing technologies struggle with unsupported angles beyond roughly:
45 degrees from vertical
Why Supports Matter
Support structures are temporary scaffolding added during printing.
They help stabilise geometry but also:
Increase post-processing time
Leave surface marks
Affect visible finish quality
Optimise Print Orientation
One of the best ways to improve print quality is strategic model orientation.
Good orientation reduces:
Visible support marks
Structural stress
Surface imperfections
At Fixie 3D, orientation planning is a critical part of file preparation for SLA printing.
Simplify Geometry Wherever Possible
Complexity Is Not Always Better
A common mistake is including unnecessary internal or invisible geometry.
Examples include:
Hidden structural systems
Fully detailed interiors
Overly dense curved surfaces
Invisible construction elements
Benefits of Simplification
Simpler models:
Slice faster
Print more reliably
Reduce processing errors
Improve production stability
The goal is not oversimplification.
The goal is intentional complexity — detail where it matters, efficiency where it does not.
Use Boolean Operations Carefully
Why Boolean Errors Happen
Most complex architectural models combine multiple overlapping objects.
Without proper Boolean unions, overlapping geometry creates:
Non-manifold conditions
Mesh conflicts
Print failures
Best Practices for Boolean Operations
Before export:
Merge intersecting solids
Remove duplicate faces
Check resulting geometry carefully
Curved geometry requires extra caution because Boolean operations on organic forms often generate hidden errors.
For large models, it is often better to print separate components and assemble them afterwards.
Communicate Clearly With Your Printing Partner
Collaboration Improves Results
Even well-prepared files benefit from collaboration with an experienced printing specialist.
Important discussions include:
Scale
Material selection
Print orientation
Surface finish
Detail priorities
Assembly strategy
At Fixie 3D, every file is reviewed before production begins. We flag issues early so they can be corrected before printing starts.
Common 3D Printing Mistakes to Avoid
Exporting Directly From BIM Software
Raw Revit or ArchiCAD exports often contain unnecessary complexity and problematic geometry.
Always clean files before printing.
Using Surface Models Instead of Solids
Printers require watertight solids.
Surface-only geometry must be converted into closed volumes.
Leaving Scale Decisions Too Late
Scale impacts:
Detail visibility
Printability
Wall thickness
Assembly strategy
Decide scale early.
Failing to Check STL Files
Always inspect exported files in a mesh viewer before printing.
Never assume exports are error-free.
Expecting Design Models to Print Perfectly
Rendering models and manufacturing models are fundamentally different.
Print optimisation is not optional — it is the bridge between digital design and physical fabrication.
Conclusion
Optimising a 3D model for printing is not a final technical step. It is a mindset that should guide the entire modelling process.
When you understand the constraints of 3D printing technology, you can make smarter design decisions from the start.
The result is:
Better print reliability
Less post-processing
Cleaner surfaces
More accurate architectural representation
A well-prepared file saves time, reduces waste, and delivers a model you are proud to present.
If you need expert help preparing your next architectural model for production, the Fixie 3D team is here to help.
About Fixie 3D
Fixie 3D is London’s specialist in architectural 3D printing and model making, with more than 15 years of experience supporting leading architectural practices across the UK.
Services include:
SLA 3D printing
File preparation and optimisation
Assembly and finishing
Spray painting
Professional model making
Location: Building A, Level 2, Unit 4 (2.4) Wembley, Commercial Centre, East Lane, London, HA9 7UR Phone: +44 (0) 203 488 1403 Email: info@fixie3d.com
Start Your Project: Contact Fixie 3D